One of the reasons we love and use Fujifilm cameras is because it’s easy to replicate old film stocks, invent new ones, and have more control over the image before we take the photo than any other camera. Some of us only ever shoot in these film simulations that we’ve made, others only use the stock Fujifilm film simulations, while others shoot in raw and then add these simulations using Fuji’s X Raw Studio on their computers.
This guide will take you though a typical Fujifilm X camera set-up, although there may well be differences to which camera you use. The basic idea will be the same regardless of what you use. This is NOT a technical post, and not a discussion on white balance, just a way to help you get to the settings quickly.
Step 1: The Look
The first step is to decide what look you are after. Are you looking to replicate old film stock? If so, One Camera One Lens has a page dedicated to over 15 unique film simulations and recipes. Take a look once you’ve read this article!
You’ll notice that these recipes have various settings that you must alter to change the look of your finished image. Each of these settings, when altered, changes the look of the photographs you take.
Step 2: Enter Your Settings
I’ve seen many articles taking you the long way off entering these settings, this is the quick way and is simple.
1. Press your “Q” button – the screen will change to your Quick settings.
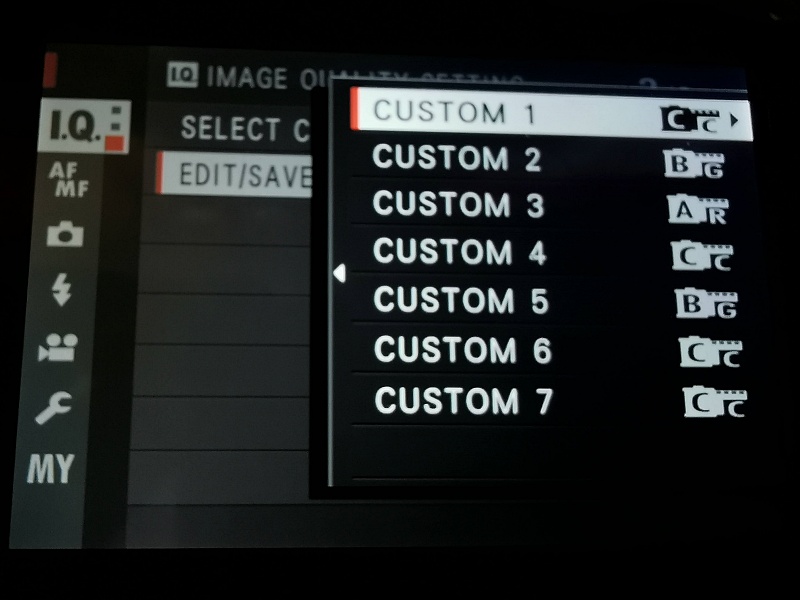
2. Press and HOLD your “Q” button for about a second – you’ll be given a list of C1-C7.
3. Scroll to a C number you want to use.
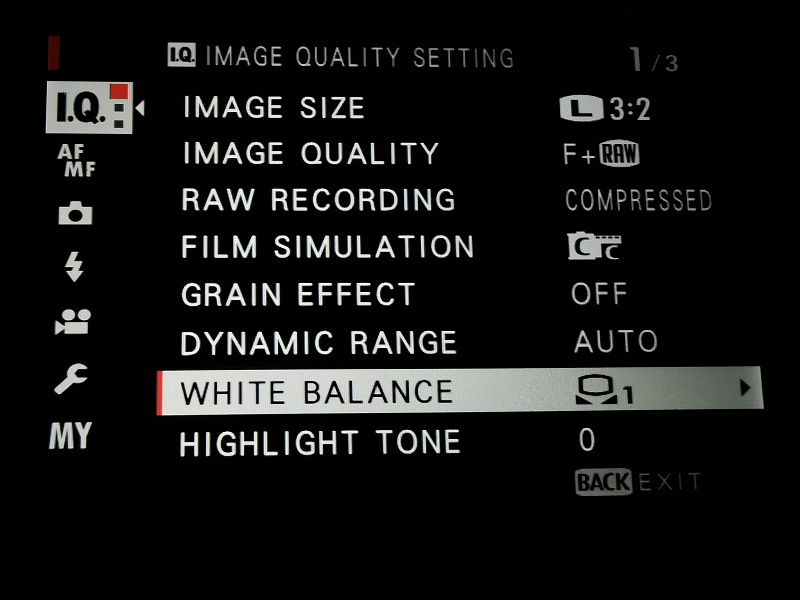
4. Press “OK” – You’ll be greeted by the various settings. Scroll through them and change them as you need.
5. Press “Back” and it will ask you to save the recipe.
And that is how simple it is. If you’ve disabled the “Q” button for any reason, you can get to step 2 by going into the menus. (Found at IQ>Select Custom Setting)
(Your menus may look slightly different)


For most people, this will be more than enough to complete the setup of a Film Simulation, however, you may want to add an R/B offset for your white balance, and this is where the fun really begins!
Step 3: The White Balance R/B Offset Conundrum
If you do not need to change the Red and Blue (R/B) offset for your recipe, you can skip this part of the instructions.
This is a step that most confuses new and not so new Fujifilm users. While you can alter many aspects of the White Balance in the Q editing of your recipes, you can’t assign a R/B offset directly into the customising function (in some cameras).
To adjust your R & B values (should you wish) you must adjust one of your three Custom White Balance settings, or other White Balance options, please see the notes on this below the instructions.
To do this, simply follow this instructions:
1. Press your “Menu” button.
2. Scroll down to “White Balance”
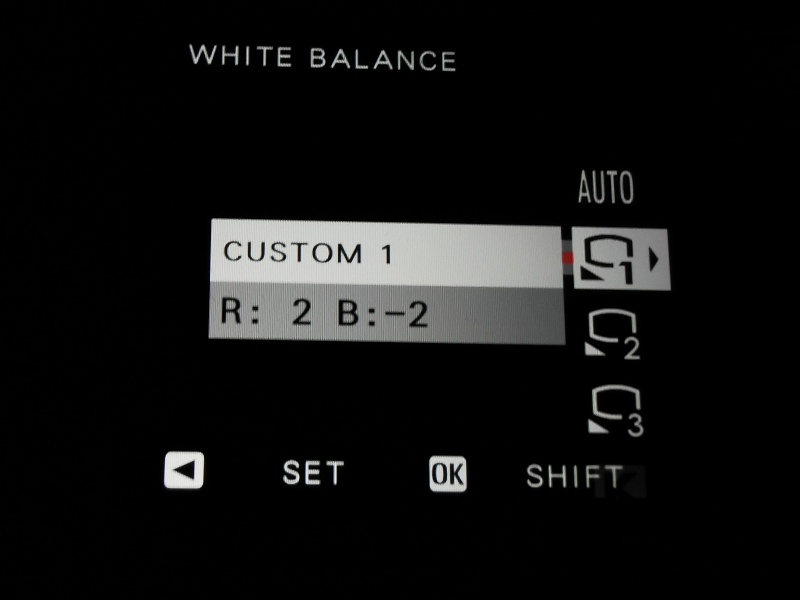
3. Choose Auto, Custom 1-3 (whichever you want to assign the R/B offset if needed and not using Auto WB) or any of the other settings such as Kelvin, Daylight, Shade etc. – Press the right arrow/joystick to enter the offset mode.
4. If in the Custom 1-3 setting you Press “OK” on the first screen, it will bypass it (and use the last value*) and you can then enter the Red and Blue values.
* To get a correct white balance if you have changed it in the past, you can point your camera at a white object filling the screen, and then press the shutter release to capture this White Balance. Alternatively you can adjust the offset in the “Auto” section and this will need to be changed each time you change settings to a new simulation. Auto, Kelvin, Daylight, Shade etc can all only have one R/B offset attached. Yes… I know it’s confusing!
(Your menus may look slightly different – Older X cameras may be missing the offset option)

You’ll need to remember which Custom White Balance is for which recipe, as you’ll need to assign it to that recipe.
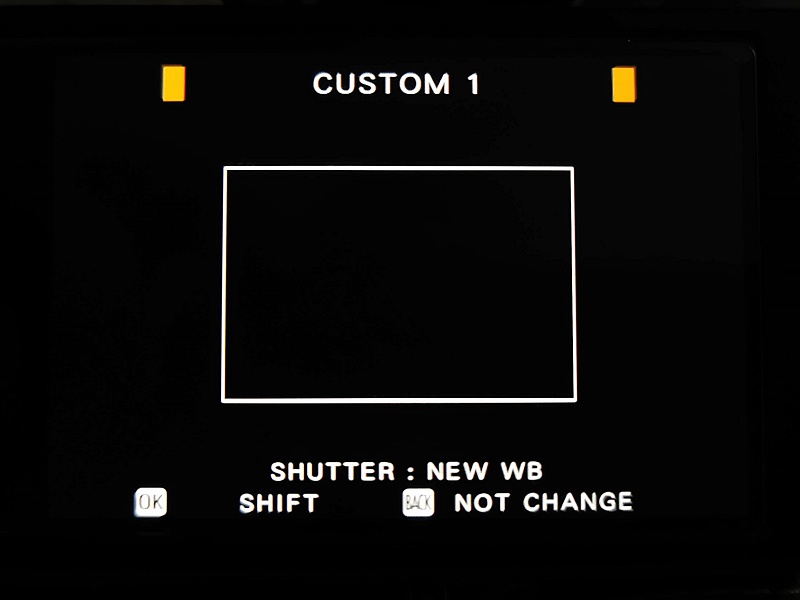
** White Card Technique **
To assign a custom white balance correctly, the manual states to point your camera and fill the screen with a white object when confronted with the “Shutter: New WB” option. This will then set your white balance for that environment.
Step 4: Use them!
Once your C1-C7 are full, get out and use them! Ideally I would set up my camera so that C1 is a default setting, with just a plain, untouched film simulation, with the ISO settings etc that you know you can rely on, and then have C2-C7 as film simulation edits.
Conclusion
It’s great fun shooting in film simulations, if you shoot in raw and jpeg, you’ll have even more options as you can take the raw file into Fuji X Raw Studio and choose different film simulations (another blog entry coming soon on this).
Don’t be afraid to experiment, and if you want the full experience, don’t forget to print your images! The film simulations you use from the internet are great starting points, and sometimes a little tweak or two can make all the difference if you’re not quite happy with the results.
Don’t forget to check out our main page which hosts film simulations, plus like and comment if you have found this useful, as it really helps me out!
— There are different variants of software in each camera, this guide is a general one and your camera may have more or less options, but the general idea should be the same in each case.

Only thing I hate about my X-T10 that it’s not compatibile with X Raw Studio. Shame, shame…
LikeLiked by 1 person
Yes, that is very unfortunate 😭
LikeLike
Trebuie să înțelegeți că tehnologia avansează de la un an la altul! Acum sper că vei reusi sa faci un apgrade la xt30
LikeLiked by 1 person
Really wanted to read good advice from your page, but I literally cannot, because of the styling, with black text on near-black background, etc. Please run some accessibility tests on your own site!
LikeLiked by 1 person
The pages are literally white text on a black background. I’m not sure why you’re seeing any different.
LikeLike