
It’s very much in vogue right now, especially among Fujifilm photographers, to try and make their images look like they were taken from a film camera. However, although Fujifilm film simulations are great, and software based LUTs and presets do a good job, they’re all “almost” the look. Here is where Dehancer comes to the rescue. A fantastic Photoshop plugin that actually gives the results you’ve all been looking for!
First off, why not just shoot film?
There are many reasons why many of us have stopped using film either recently or a long time ago, and I talked about those reasons in a recent article which can be found here.
To sum them up briefly, film is very cost inhibitive these days, and you can replicate the exact process of shooting film on your digital camera. There are many more points discussed in that article above.
What is the film look?
Images captured on film just look slightly different to digital images. Other than just the obvious fact that there is no grain on digital (although you can get noise, which is different and for different reasons), the way the image is rendered is very different, and we will look into the different aspects of this as Dehancer actually allows you to tackle these image traits.
Images on film are usually not as clean or clinical looking as digital images, they have a character all of their own. The colours can vary greatly also from film stock to film stock, and you can have great deep shadows and highlights which are well controlled.
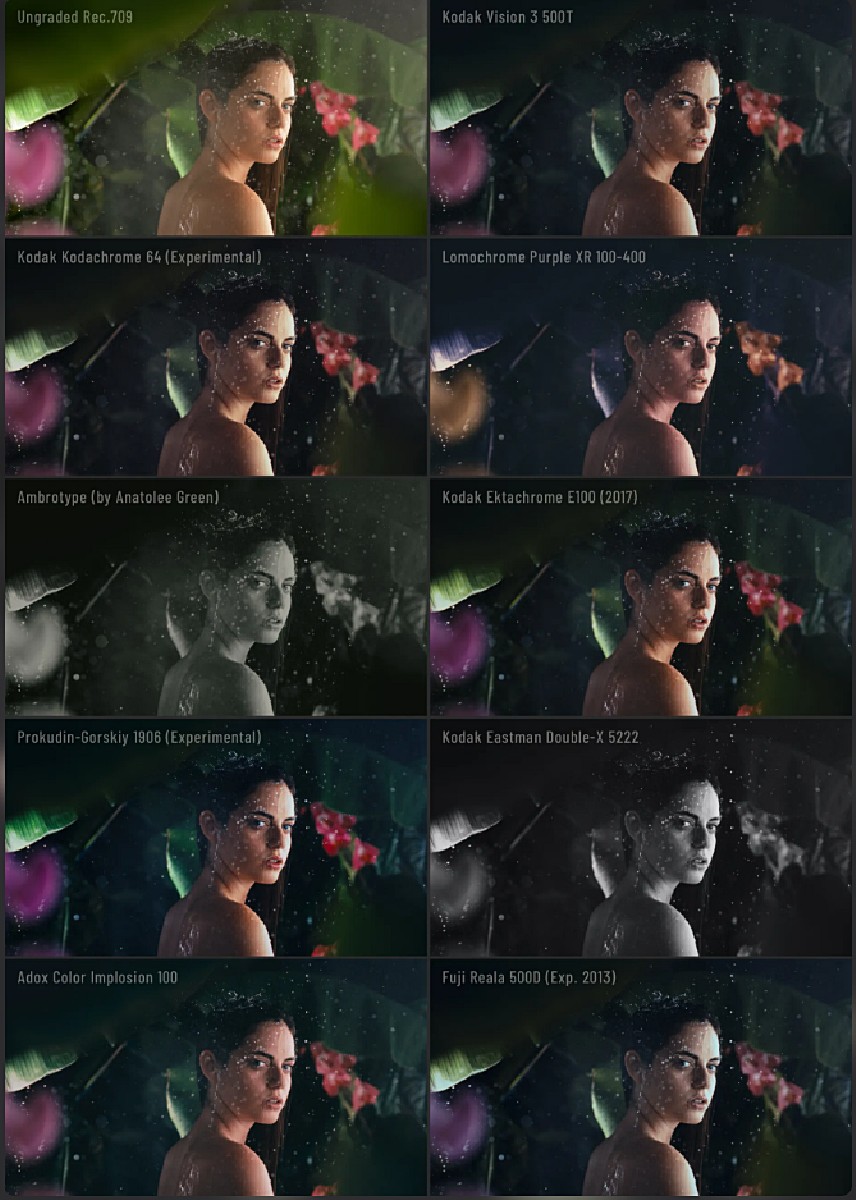
Dehancer emulates film stock from a range of 35mm film stocks, right through to cinema-based film stocks, so there is plenty of choice to get the film look that you want. These cover very early film stocks, to more recent film stocks.
What Dehancer is NOT.
Before you consider Dehancer, you need to know it’s not just a collection of LUTs or presets to put over your image and colour grade them. On their website, they go into great detail as to why it just would not be possible to obtain the authentic film look if they used LUTs. It’s worth a read, so you understand the limitations of other software and techniques that try and create the film look with simple fixes.
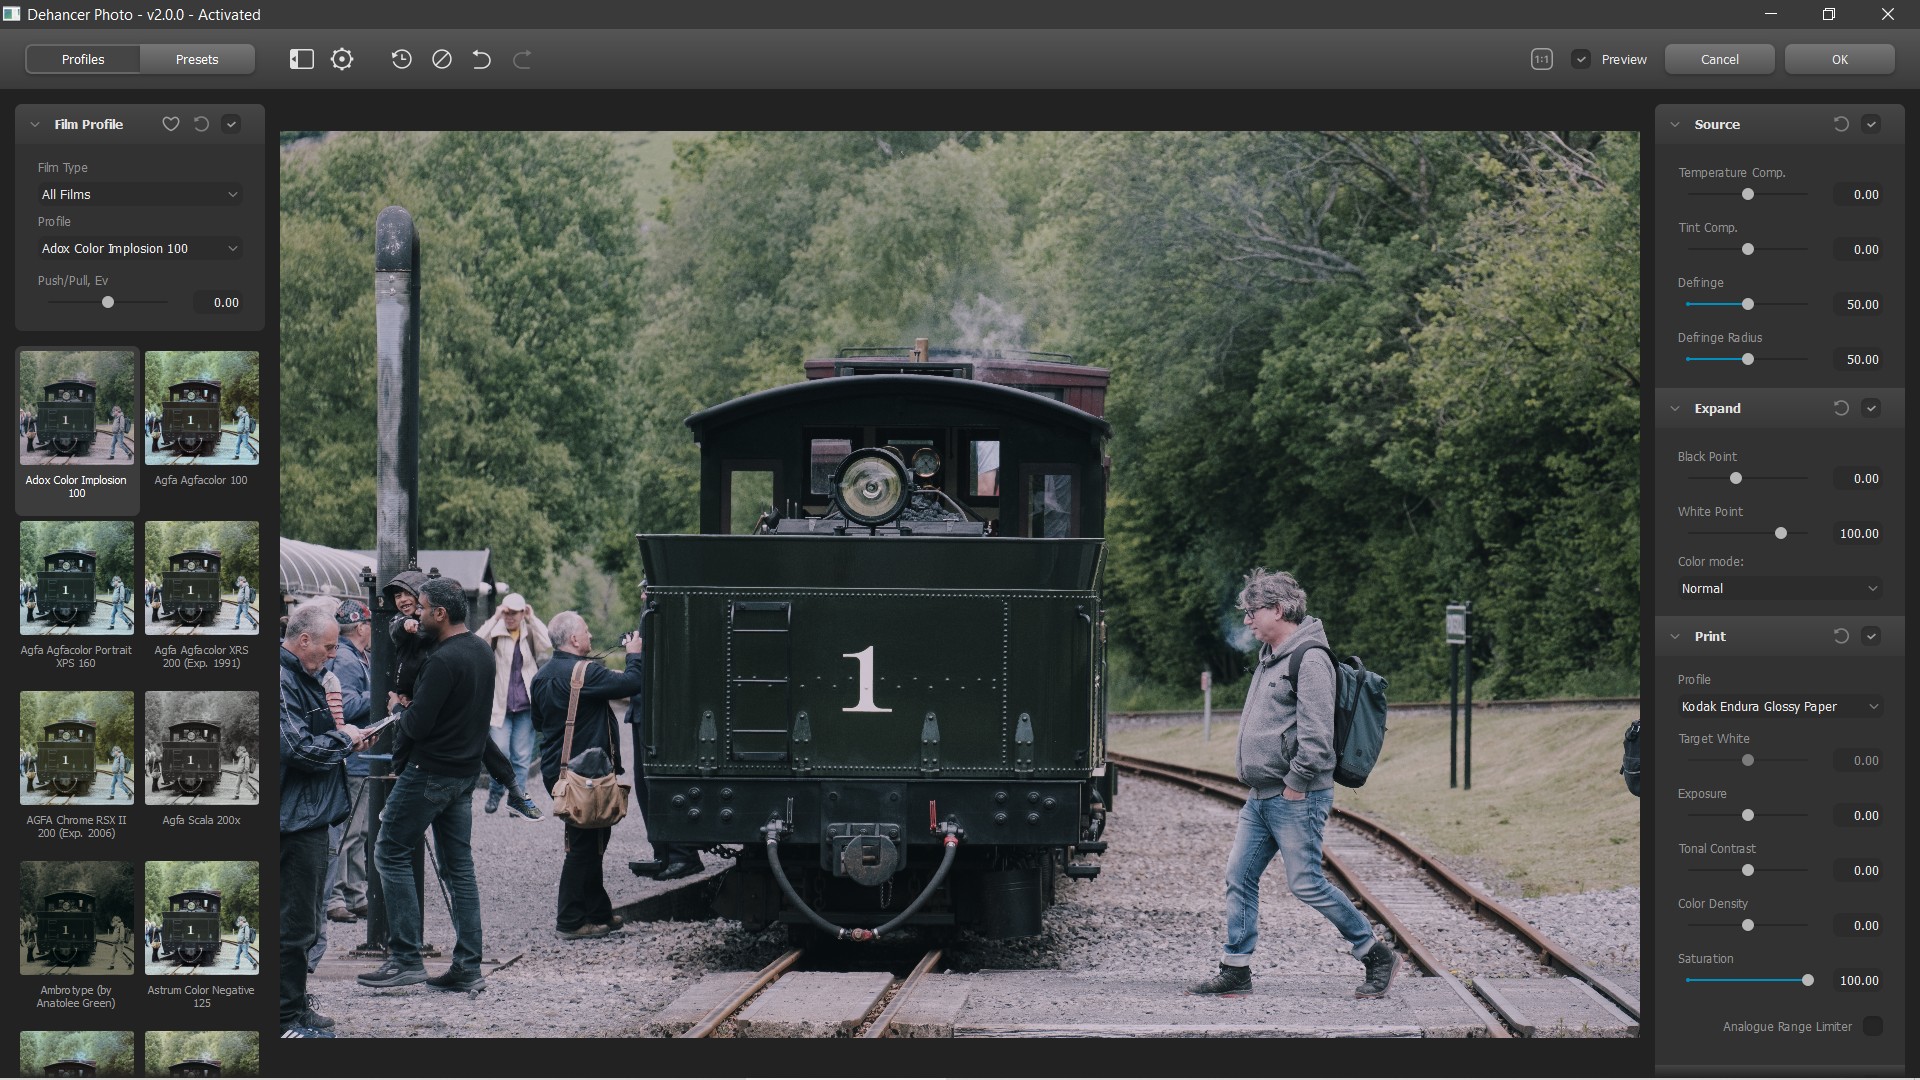
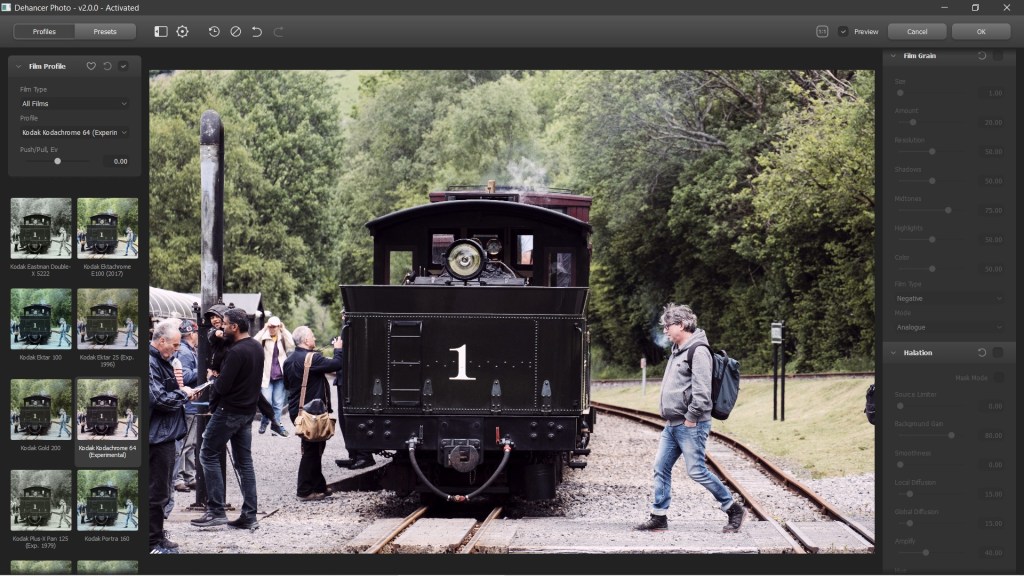
Dehancer isn’t a one click, quick fix as if you’re adding a colour profile. You’ll have granular control over every aspect you adjust (below is a screenshot of Dehancer after it’s just opened an image in Photoshop).

Dehancer…
Dehancer can only be used as a plugin for Photoshop. Simply edit your image first in Photoshop/ACR and get the image to the point where you’re happy with it. The final step then is to load it into Dehancer to at the filmic look that you want to achieve.
This image is Photohop Classic Chrome that has been tweaked.
Your image will load into the Dehancer interface, where you’ll be treated to a very friendly experience. On the left of the screen you’ll find the looks and a couple of adjustments, while on the right you’ll find your adjustments area. It’s advisable that you read the instructions as to what these settings do, as they can really change the look of your images.
Because this isn’t just a set of LUTs, when you adjusting things such as exposure, the image will not react like it did with a digital image, but they have programmed the software to act as if you are actually over exposing film. It’s very clever, and for those who have shot film before, it’s a wonderful experience. Experiment is key, but well worth it.
So, starting with exposure (push/pull), here is where Dehancer really separates itself from presets and LUTs. The look when adjusting the Push/Pull process is different for every film type, as all film behaves differently. Dehancer takes this into account, and has accurate simulation from -2EV to +2EV where they’ve samples actual film to emulate how each one reacts
You can choose the “print” type. This is especially relevant for cinema film types. An image can be displayed boys technology like a projector, or printed. This is important as a lot of people only get images scanned, and they are missing out on the actual look if film.
Taken from the website “Scanning the negatives always involves internal software algorithms and digital processing profiles, focused on obtaining a ‘ready to use’ image, and not on faithfully reproducing the color-contrast characteristics of the original film sample.
That’s why we believe that when sampling negatives, it is fundamentally important to exclude the use of a scanner.
This can only be done using optical printing. For example:
Optical printing of a negative on photo paper
Optical printing of a negative onto print-film”
This alone should let you understand how different and serious Dehancer is at replicating the authentic film look. These guys know and understand that film that is printed from a negative, is very different to film scanned digitally.
Grain on images is important in getting the film look, and once again Dehancer has multiple options. These are not simply overlays, but the grain is replicated as it would be produced on film. You have numerous options to tweak it too, plus you can choose authentic film grain of digital film.
If you want to get really technical (even more technical even!) you can adjust the CMY colour head process… Reading their website later would be better as this is quite technical.
Halation is emulated, something you don’t get by using other packages or if you are trying to get the film look straight from camera. Halation is a visual effect that appear when shooting on a film as a red-orange halo near the contrasting boundaries of over-exposed areas, as well as a red glare in the mid-tones. Usually, Halation is produced around bright light sources. It’s very subtle, but the difference it makes to the final image is quite amazing and very authentic.
We also have bloom which can be added to your images. Bloom in the context of Dehancer is the way it disperses light. Again, it’s an important part of the film look, and Dehancer gives you all the options you need to achieve the correct look for the correct situation.
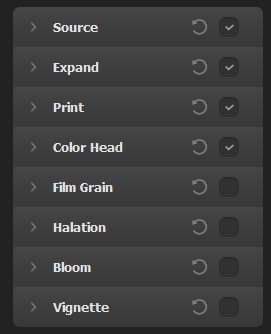
There is so much more to Dehancer, as each of these options and more have numerous variables that can be tweaked should you wish to. In my testing I found that I liked to add grain but a bit finer than in real life for example. You can also add a vignette, but personally I prefer to do this out of this software.


Right: Kodachrome 64 with Grain, Halation & Bloom
The above side-by-side shows you the dramatic difference you can achieve by adding Grain, Halation and Bloom. Of course, you don’t have to add the all, you can add just want you want. However, one look at this should show you the way the image suddenly becomes much more organic.
Conclusion
If you like the look of film, Dehancer has a selection of 60+ film stocks (63 at the time of reviewing), both colour and black & white, plus some lesser-known film types and cinema type film. The results you get are extremely good, and far better than just adding LUTs, presets or straight out of camera Fujifilm recipes.
For anyone who is even a little bit serious of achieving the filmic look, Dehancer is a must purchase. However, to the untrained eye, or if you have not used film, you might not see too much difference to other programs, as the images changes can be subtle (just like they should be). Are the changes enough compared to just using an LUT? For me, the majority of the time, yes, it’s worth it. For others it might not be.
How do images look compared to Fujifilm recipes?
As a final note, I am in many communities of Fujifilm photographers that try and emulate film in camera. To be honest, although people name these recipes as film stock, they rarely look like the actual film stock, missing so much of the character of actual film. Shooting Fujifilm recipes is fun, it’s not a replacement for film or Dehancer.
Final Note.
I am in no way affiliated with the team at Dehancer. I was given the plugin to review and all my thoughts are my own. I will not get any money when you visit their site at http://www.dehancer.com and as always, I will follow up this review when I have used it even more extensively or any updates are made to the program. Please follow my Instagram account where I hashtag the software that I use, and please keep supporting this website.
Plugin available from http://www.dehancer.com

Great find Mark !
LikeLiked by 1 person
Thank you, it’s a damn good plugin too!
LikeLiked by 1 person