

Darktable is a fantastic editing program, but it is not without its faults. For many, Darktable is overly complicated, and the tutorials available for it are technical or too long winded to sit through for many people. For this “Darktable Simplified” tutorial (as I’ll call them from now on), we will quash your worries and issues very simply.
First of all some information about me and my photography and the use of Darktable. I’ve been using Darktable since around 2010, in that time I’ve developed many thousands of images using Darktable. Because I teach photography, I am also proficient at other software packages such as Adobe Lightroom, Luminar Neo, DXO PhotoLab, ON1 and more. However, my preferred software is Darktable (along with Gimp) for the more creative edits (don’t ask me why, I just really enjoy using it!). I am a full time photographer, and this is how I earn my living.
The Issue
Using Filmic RGB or even Sigmoid in some conditions, you may encounter an issue with hue colour shifts occurring in your images. I have been contacted by a few people with regards to this issue, and I’ve been asked to make a “Darktable Simplified” tutorial. These tutorials are to get you excellent results, very quickly, and with as little technical knowhow as possible. If you wish to understand the technical aspects of why this happens or different techniques on correcting them, there are many technical videos available on YouTube that can be found in the resource page that shares various other Darktable tutorials by other people here.
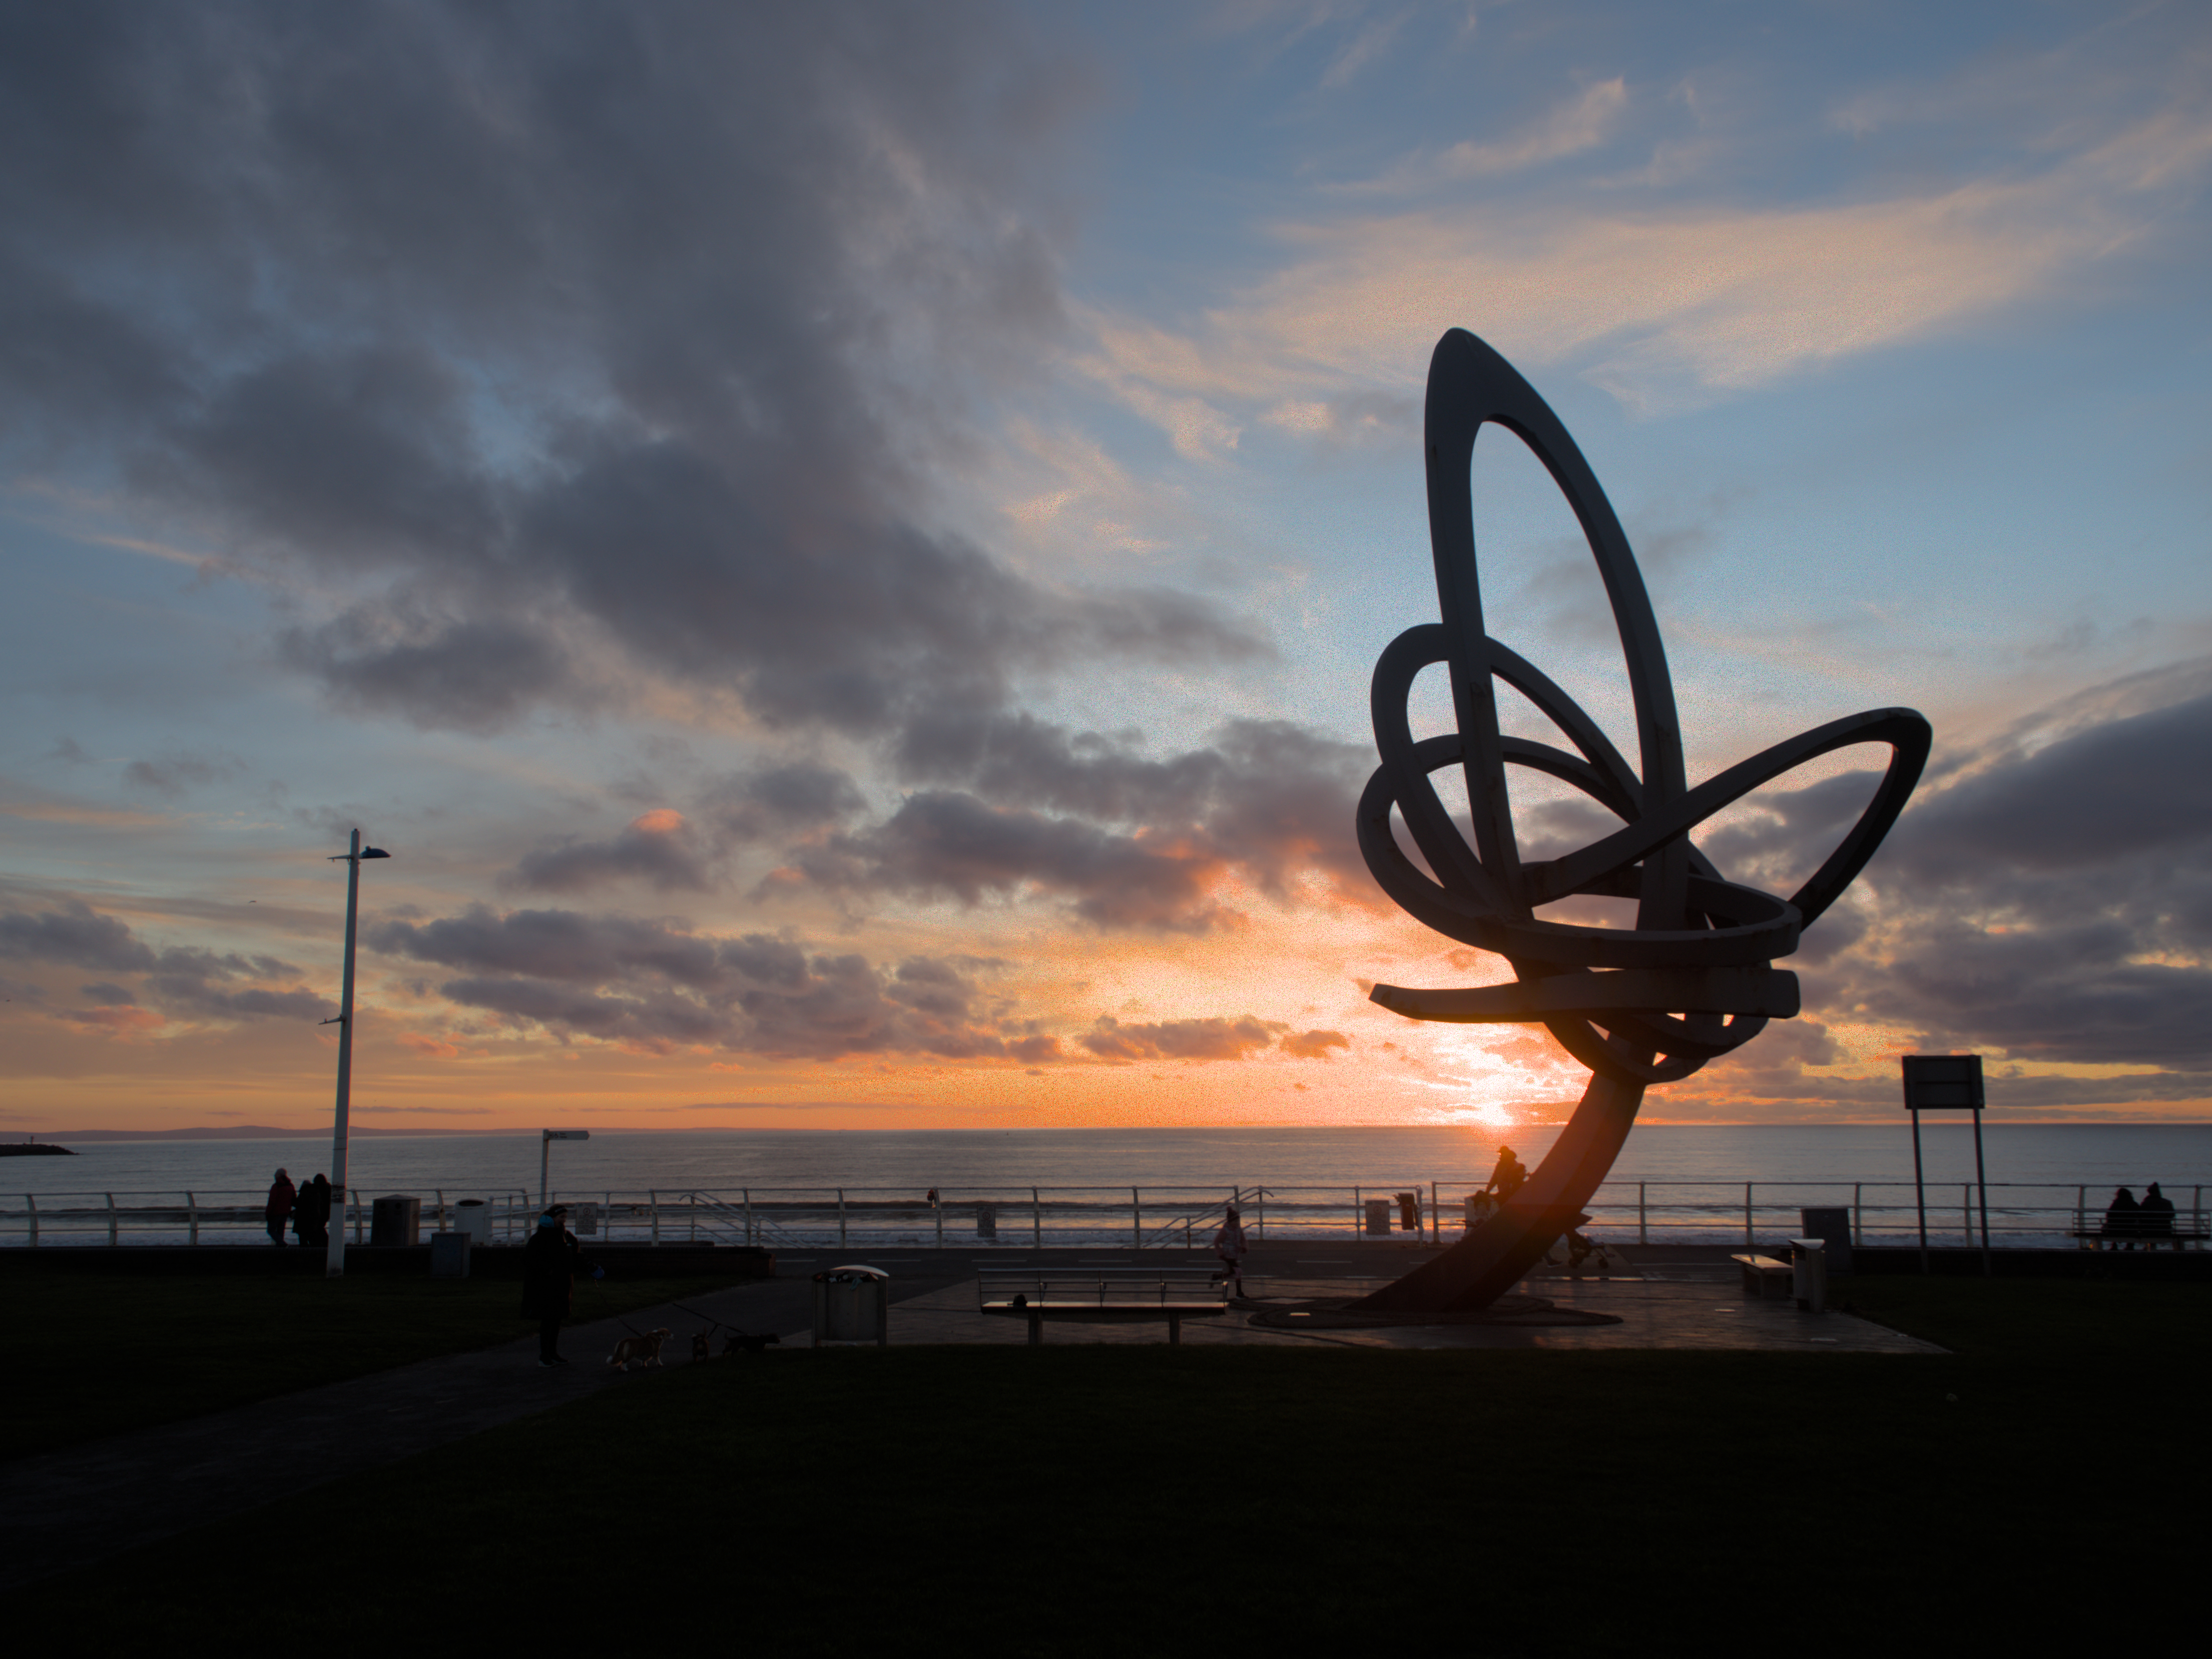
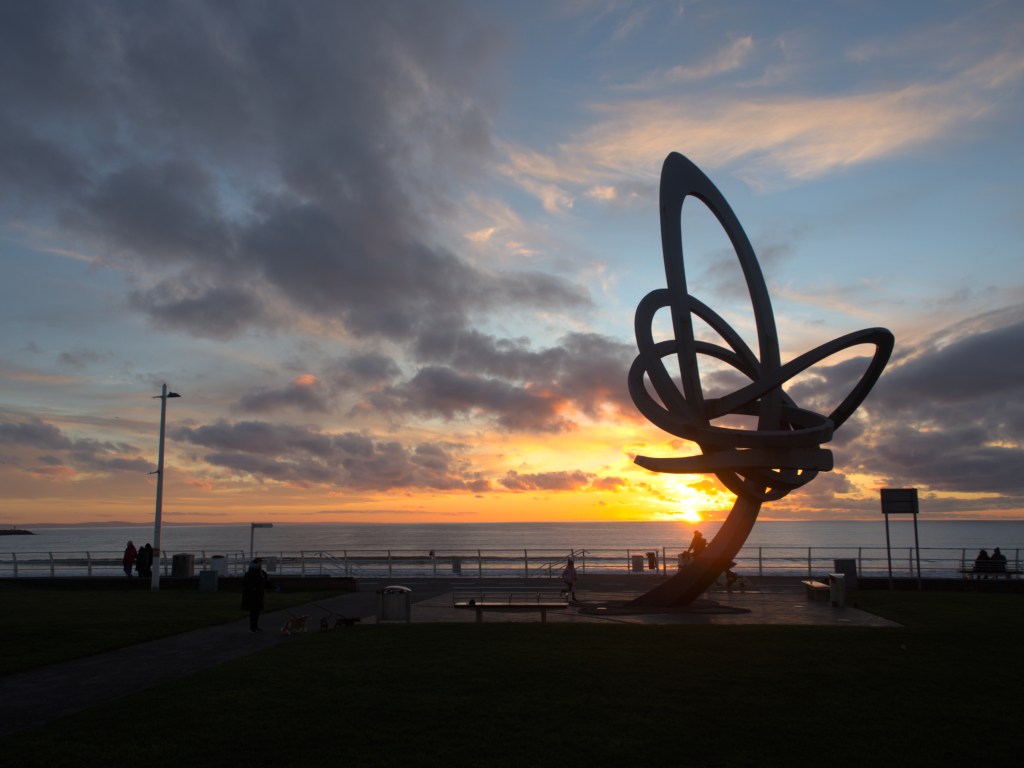
As an example of what you might get, look at the sunset photo below, to the left is the original image without Filmic or Sigmoid applied, and to the right is the image with Filmic V6 applied. All images in this article are based on Filmic RGB, however, techniques 1 & 3 can be applied to the Sigmoid module also.

We are going to look at three very simple techniques, and show the final image and talk through the steps for each. This will be super-simple, but super effective, and save you hours of hair pulling moments!
Technique 1 – “Super Easy”
The simplest solution… Don’t use either Filmic RBG or Sigmoid. As you can see below, the results are great! Of course, you may not want to do this for revert image, but it works and the end result is all that matters.

Technique 2 – “Quick & Easy”
The second technique is also very simple, but will involve going into the settings to change just two settings! This is for the Filmic RGB only.
1. Turn on the Filmic RGB and go into the module.
2. Click on the usual “auto” to set the levels.
3. Click on “options” within the module.
4. Change Filmic to V5.
5. Set “Preserve chrominance” to No.
As you can see, there are a few more steps, but the hue shift should be gone on almost all of your problem areas.

Technique 3 – “Easy & effective”
The third technique is very simple, and gives very good results. This can be used for either Filmic or Sigmoid.
1. Turn on either Filmic or Sigmoid.
2. Click on the parametric mask.
3. Move the right slide across until the highlights only are covered and then press the invert button on the mask.
This gives you the benefit of using the Sigmoid or Filmic and not have those hue colour shifts! You can adjust the relevant module as needed, and carry on editing.

Conclusion
The referred workflows of Darktable really confuse many people, as does the inclusion of Filmic RGB and Sigmoid which do very similar things. Using the techniques above will speed up your workflow and you’ll get the same amazing results without going through a host of convoluted instructions. Of course, if you want to spend hours correcting colour shifts, there are plenty of YouTube videos out there that will talk you through many many steps to achieve what we did he in a few steps.
I have been overwhelmed by the feedback if these Darktable Simplified tutorials, and I hope this one really helps you get started. These are the options and techniques that I use, and I am more than happy with the results I get from them.

Very good tutorial Mark !
I think Darktable’s problem isn’t so much with being “overly complicated” but rather with their way of handling photos, specifically their “importing en catalog” module.
Many people (including me) hate this way of working, and would much rather do their processing with a normal photo explorer/browser. To make matters worse, you have to delete that catalog manually when you want to empty the module. I understand very well why the makers of Darktable have done this, but not everyone wants this.
Without this module, Darktable would be the perfect alternative to almost any paid software.
My workaround is to use another viewer/browser, send a photo to be edited to Darktable, and regularly empty the catalog, but this is cumbersome.
LikeLiked by 1 person
The importing catalogue is one of my favourite features and the reason I use Darktable over RawTherapee etc! It makes it work much like Lightroom, and is essential for doing bulk work. It just makes things so much easier, and they have really improved it in the latest versions so that is super fast and has more utilities. From that view you can easily cull, compare, tag, search tags and so much more. I honestly couldn’t live without it.
LikeLiked by 1 person
In Sigmoid you can pull down the Preserve Hue slider to control that color shift
LikeLiked by 1 person
Correct, but it doesn’t always work from the hundreds of tests and images I’ve edited.
LikeLike
Hi,
Thank you for the tutorial! I agree with Mark R. above about the importing of complete catalogues. I prefer choosing single pictures and then work with them. But I’m not a professional photographer.
Another thing with the modules; I don’t really like what they are doing! Both highlights and shadows are in my opinion much better in the original picture. Highlights are washed out and shadows show no detail as the contrast is too high with the modules. Just now I’m not using a calibrated screen but it’s an Amoled on a 12″ tablet of good quality. I wonder about the initial settings if Darktable makes them automatically when you just open a picture? Sorry for my ignorance!
LikeLiked by 1 person
You can set Darktable to have no initial settings (as I do), other than the ones needed to obviously display the image in the first place if you want to.
LikeLike