
Introduction
Being a portrait photographer inherently comes with a responsibility to ensure the model looks their best in the final images. It is important to showcase their natural beauty, but at the same time remove “imperfections” that otherwise may be an unfair distraction. This brings us swiftly on to the subject of retouching; the “dark art” through which blemishes, pimples, spots etc are removed from skin in post-processing. While most photographers tend to agree there is a time and place for retouching, especially if done “tastefully”, opinion is very much divided once we cross that invisible and subjective border into “excessive and unrealistic” processing, such as that airbrushed magazine look we’re all familiar with (and I myself am not keen on). Personally, I think we’ve become a bit too caught up with how other photographers edit their photos, especially on social media where the modern keyboard warrior loves to hide, pretending to be an expert whilst sporting a typically substandard portfolio. Surely, as long as the model is also happy with the result, we should be able to process our images however we please without being cooked half to death on Instabook? Regardless, it is important that we establish our own personal boundaries of what we will and will not do to our images, and that we are entirely comfortable with everything within these boundaries.
My general rule is quite simple: “remove what is temporary, leave what is permanent”. In other words, if there is something there that won’t be there next week, and perhaps wasn’t even there yesterday, then I’ll remove it. I would consider it unfair of me to refuse to edit out a spot or blemish that had appeared on my model’s face that morning just for the sake of a stubborn principal of never retouching images. After all, life has a habit of doing the dirty on us like that, e.g. placing a spot right in the middle of our forehead or on the end of our nose on the morning of a job interview or a wedding. It’s one of those situations that is accompanied by an eye roll and the word “typical”! So why allow something that is untimely and temporary to be baked into the final image? On the other hand, I will not remove moles, birthmarks, skin tags etc unless the model specifically asks me to (I will never suggest it or even initiate the discussion). I believe “permanents” such as these are part of the beauty of the individual. With these boundaries established, I can work comfortably with clear, undoubted objectives. Of course, your boundaries may differ slightly or even profoundly, so long as you your mind is clear as to what your own personal boundaries are.
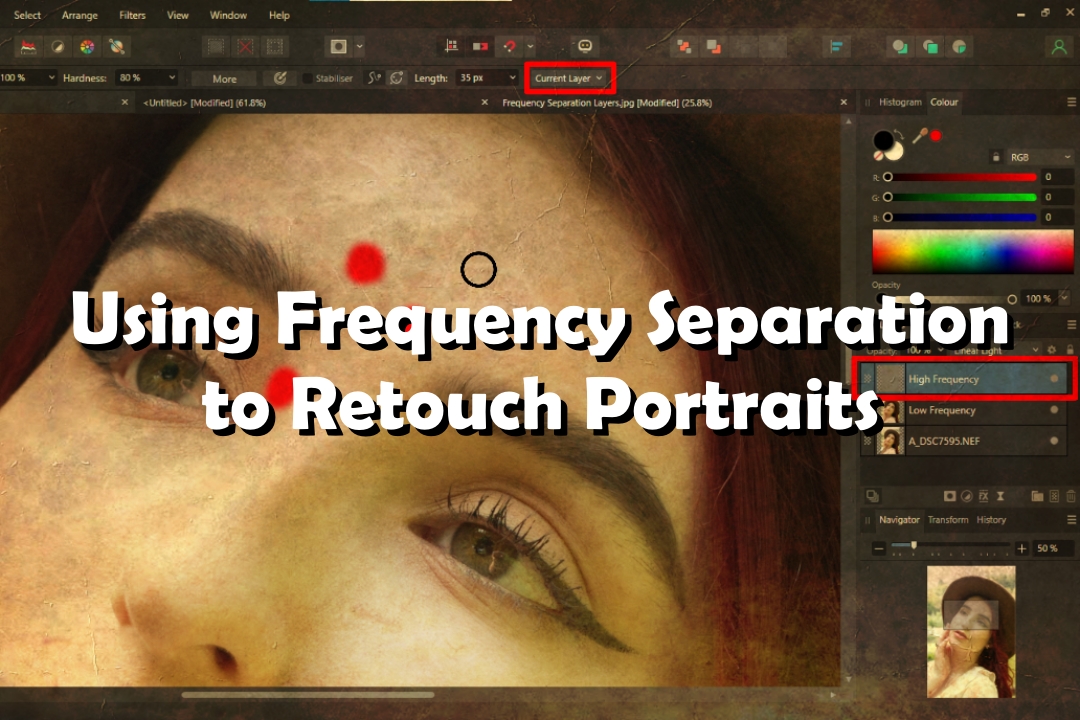
I have tried numerous ways of retouching skin and in my opinion the best way by far is through Frequency Separation. Just for clarity, this blog is not intended to be an out-and-out teaching resource, because for obvious reasons a written blog is not the best way to demonstrate editing techniques; video is. We all tend to use YouTube nowadays for that, and I’d encourage you to do so after you’ve read this blog and understand the theory and logic behind it. I will describe the steps involved in my own personal way of working, with the aim that this will inspire you to investigate further and give it a try for yourself.
Frequency Separation
Frequency Separation divides your image layer into two separate layers, one with high frequency information (containing texture and detail) and another with low frequency information (containing colour and tone). Dividing your image in this way means that you can work on these two facets separately (instead of working directly on a duplicated image layer, for example). This may initially sound daunting and even more time-consuming than usual; however, in reality it speeds things up, because dealing with texture separately from colour and tone means you don’t have to mindful of one while working with the other. By contrast, working on a single image layer can often be slowed down by stretching the capabilities of the various retouching tools too far, and can often lead to a “blotchy” final result.
Step 1: Separate Your Image Layer
It can be useful to first duplicate your image layer and apply Frequency Separation to the duplicate. This is not necessary to make the process non-destructive, but it can provide an easy and quick way of observing the before and after.
When applying frequency separation (Filters>Frequency Separation, in Affinity Photo) you’ll be presented with a preview of what your high and low frequency layers will look like at the default settings (Figure 1A). As you drag the slider rightwards you’ll notice more fine detail appearing in the high frequency layer preview and the low frequency layer becoming more blurry as more and more detail and texture is separated from it (Figure 1B). Drag the slider too far right, however, and you’ll see colour and tone start to bleed into the high frequency layer, which we don’t want because we’re trying to deal with the two separately. The aim therefore is to ease the slider as far to the right as we can to maximize the detail loaded into the high frequency layer without allowing any bleeding of colour or tone from the low frequency layer. Once you find a good compromise, click “Apply” and your duplicate image layer will be separated (Figure 2).

Figure 1. Frequency Separation Preview Dialogue, with its default setting of 2px showing minimal texture and detail in the high frequency preview (A), and more detail emerging in the high frequency preview as the radius slider is taken to the right, prior to any bleed of colour and tone information (10px for this image) (B).
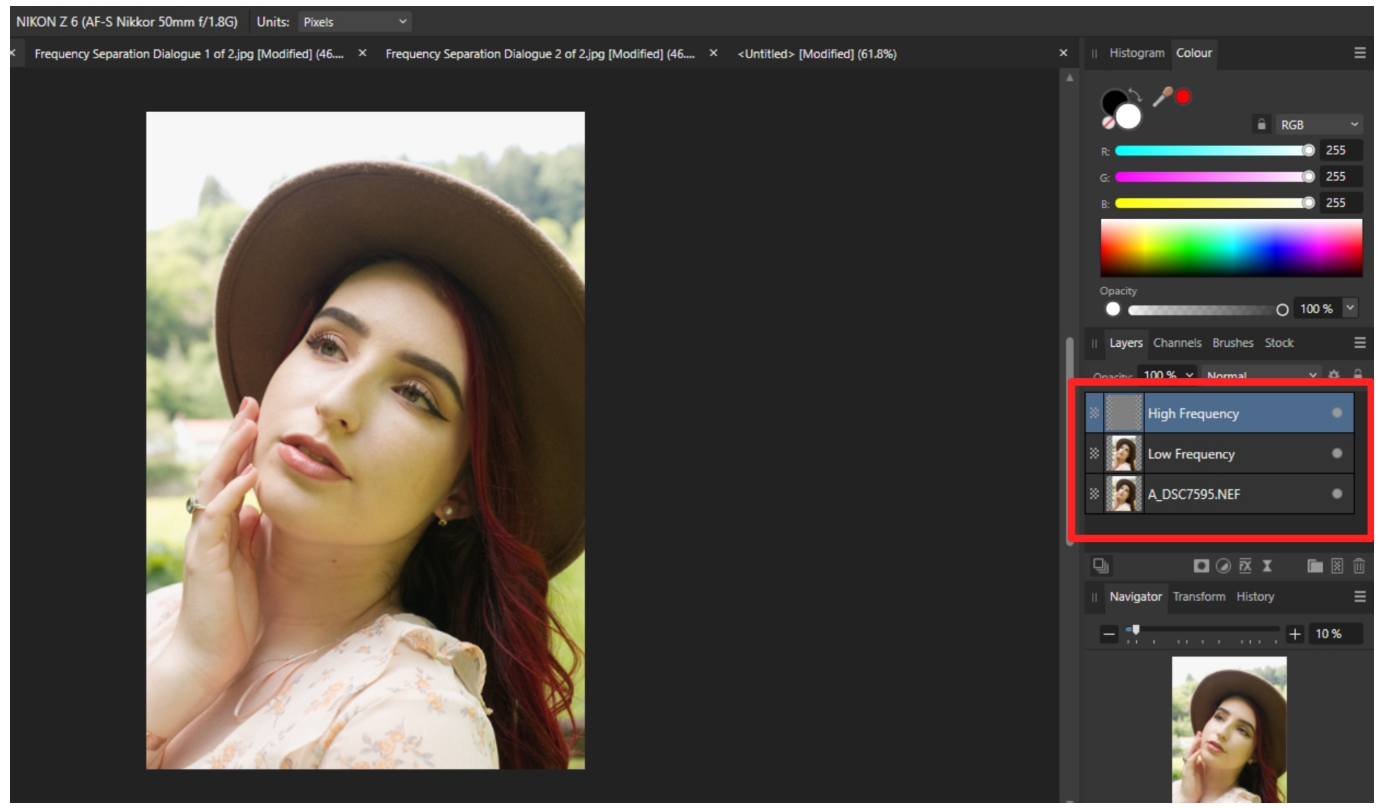
Figure 2. After clicking “Apply” your duplicated image layer is separated into high frequency and low frequency layers and you can now begin working on these layers separately.
Step 2: Retouching Your Portrait
Of course, there is more than one way to retouch portraits (in fact, there are numerous ways). There are after all a number of different retouching tools available to you in software such as Adobe Photoshop and (the software I use) Affinity Photo, as well as Darktable, GIMP etc, and over time you may discover your own preferences. Here I will simply be discussing what I do, which will be simple enough for you to follow if you wish to try this for yourself, and serve as a foundation to build your own technique.
(i) High Frequency Layer
For this layer the simplest tool to use is the Inpainting Brush (Affinity Photo) or Content Aware Fill Feature (Photoshop). These are used to quickly remove problem objects within an image, which we can manually identify with a brush stroke and allow the software’s awareness of the immediate surroundings of that area to intelligently fill in the missing pixels following object removal. Try to use a brush size just a little bit larger than the blemish you want to remove, but don’t make it unnecessarily large (use the left and right square bracket keys as a shortcut to alter the brush size). Ordinarily when using the Inpainting Brush (on a blank layer, for example) we would want to select the option “Current Layer and Below” from the context toolbar. However, because we are working on distinct facets of our image on different layers, and do not want the Inpainting to be reflected in the low frequency layer, we need to leave this option at its default of “Current Layer”.
Make sure your high frequency layer is selected in the layers panel and begin making brushstrokes over problem textured areas. This may be a quick process, or may take a while, depending on the image. Just take your time and enjoy the process (see Figure 3).

Figure 3. Inpainting on the high frequency layer. Ensure the High Frequency layer is selected. With the inpainting brush from the left hand toolbar selected and “Current Layer” selected on the context toolbar at the top, paint over blemishes, pimples, spots etc. Your brushstrokes will briefly be highlighted in red until the software deals with them. Take your time and ensure all significant blemishes are inpainted.
(ii) Low Frequency Layer
After dealing with the high pass layer we are usually left with colour and tone inconsistencies left behind by blemishes. We want the colour and tone to reflect our new, retouched skin convincingly. For this purpose I prefer to use the clone stamp tool (clone brush, clone tool; whatever your software calls it). The clone stamp tool allows us to sample from one particular area and copy it on to another area. For example if we have some colour inconsistency cause by the presence of a spot or blemish (the texture of which we have already removed), we can sample from an area of blemish-free skin nearby that is similar in colour and tone to what we feel should be present in the problem area. To avoid blotchy results it’s usually a good idea to set the clone tool to a lower opacity (100% is usually way too high; try 25% to begin with) on the context tool bar. To sample an area of skin hold down “Alt” (or “Option”, if working on a Mac) and click. Remember to keep your brush size to as large as you need it and no more.
Now paint over the problem area. Because of the lower brush opacity you can make multiple passes to make blending more seamless/less blotchy. Notice how the cursor from the sampling area follows your mouse movements as you brush, sampling as it goes. Remember to keep sampling from suitable areas as you progress with the retouching across the image. What may chromatically and tonally suit one area is unlikely to suit another. Even within one area you may need to sample more than once (see Figure 4). As you become more skilled using the clone tool progress will become much faster.
You can also use this technique to soften shadow areas from under the lips, chin and around the eyes.
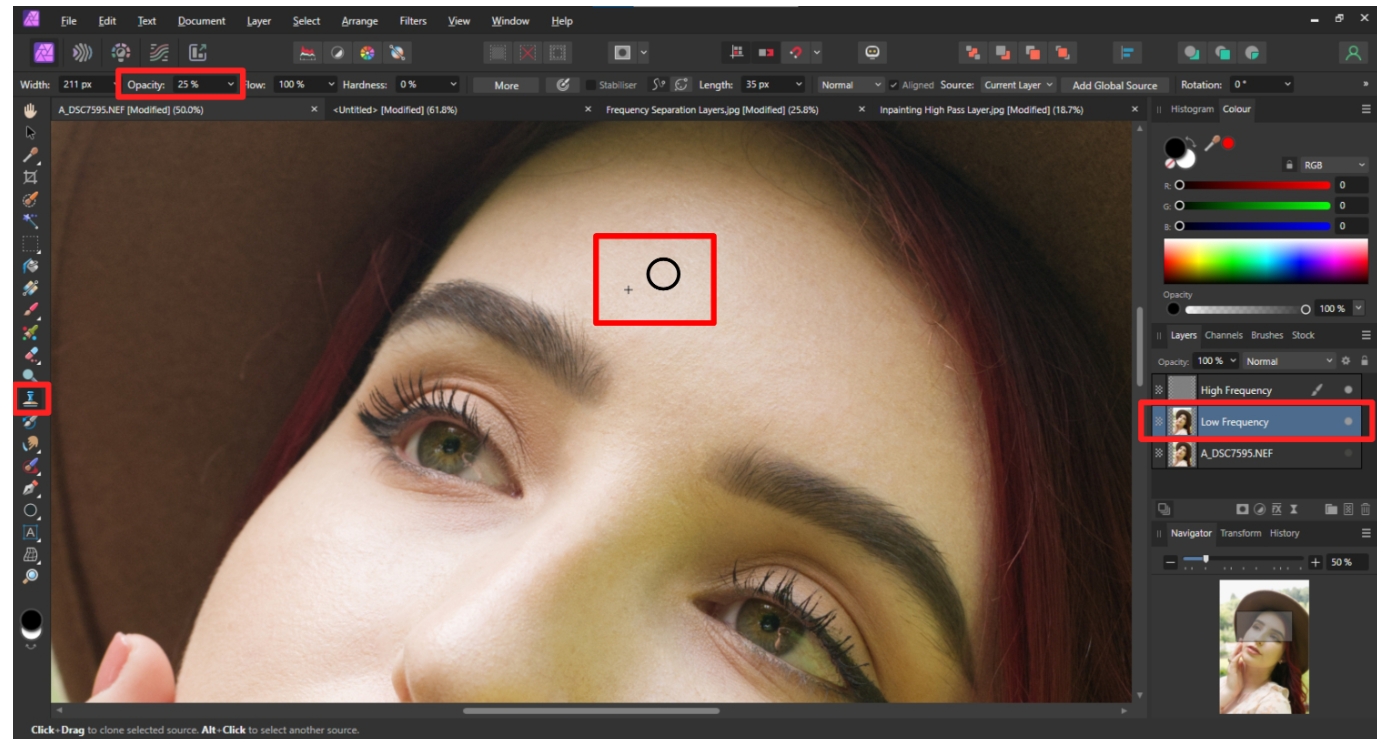
Figure 4. Using the Clone Stamp tool to correct colour and tone inconsistencies on the Low Frequency layer. Ensure the Low Frequency layer is selected. Select the Clone Stamp from the left hand toolbar, set the opacity to approx 25% on the context toolbar at the top, then sample an area of suitable “donor” colour and tonality by holding “Alt”/”Option” +click, then make multiple brush passes across the problem area, resampling if necessary. Repeat for all problem areas of skin.
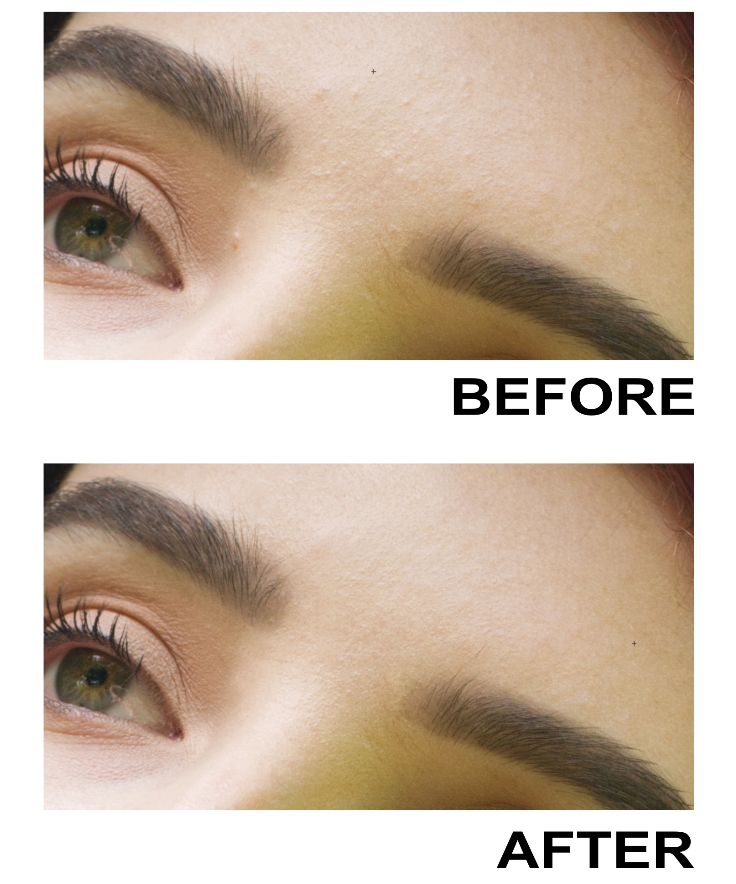
Figure 5. Before and After retouching using Frequency Separation. It’s quite a transformation, and this is before we make the image pop with further editing (see below).
Conclusions
You will note from your final result that you have managed to clean up problem areas, and maintain natural looking gradients of tone and colour without losing the natural texture of the skin. The loss of one or both of these is a common symptom of using retouching tools on a regular image layer or merge visible layer. Frequency Separation effectively gives the algorithms of these tools less to deal with in one go, and as such they will have a much higher “hit rate”, leading to a more pleasing, natural and professional final result. A bonus of this technique is that it allows you to work much faster overall. While it may seem a daunting technical task to begin with, you’ll actually be surprised how much easier, satisfying and effective your portrait retouching (and editing in general) becomes. Give it a try, and please feel free to contact me with any questions.
Many thanks for reading
David Ellinsworth (Photographer and Blog Author)
instagram.com/david_ellinsworth (main account)
instagram.com/david_ellinsworth_film (film photography account)
flickr.com/photos/davidellinsworth
https://purpleport.com/portfolio/davidellinsworth/
Claudia Sampford (Professional Fashion Model)
instagram.com/claudiasampford
https://purpleport.com/portfolio/claudiasampford/

Final image, including further edits. Model: Claudia Sampford, professional fashion model.
