

Darktable is an amazing piece of software, however, the decision to develop a separate module from the Filmic RGB module which they have named Sigmoid has caused some confusion among Darktable users. They are both intended to do the same, or very similar things, but both give quite different results.
First of all some information about me and my photography and the use of Darktable. I’ve been using Darktable since around 2010, in that time I’ve developed many thousands of images using Darktable. Because I teach photography, I am also proficient at other software packages such as Adobe Lightroom, Luminar Neo, DXO PhotoLab, ON1 and more. However, my preferred software is Darktable (along with Gimp) for the more creative edits (don’t ask me why, I just really enjoy using it!). I am a full time photographer, and this is how I earn my living.
I am not going to make this article technical in any way. I’m a strong believer that you should only need basic knowledge of sliders and then as you gain knowledge you can look into the technical side if you really feel the need to… This slider increases/decreases saturation, this slider increases/decreases exposure etc in order to make an edit should be all you need to worry about. You already know the exposure triangle and understand the basics of your camera, and editing should just be an extension of this.
Filmic RGB, Sigmoid or Nothing? How do you decide?
In basic terms, Filmic and Sigmoid are modules to control and contain the dynamic range of your images. They will ensure your output (either display referred or scene referred) enables you to see the blacks, whites and all the colours in-between.
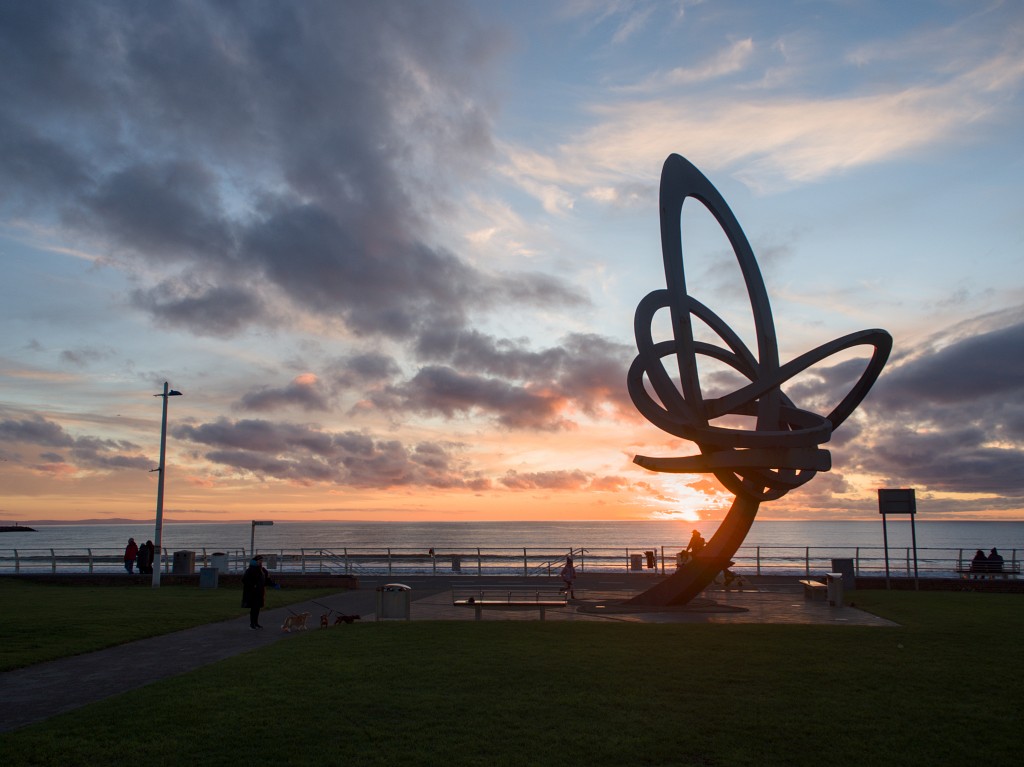
For the examples below, we will see an image with the same basic adjustments applied to all three identical images (All images have lens correction, exposure set, global saturation 20%, global chroma 10% and local contrast 130%) , the second images are with Filmic V6 (going into the Filmic RGB module, the auto tune levels was selected, and then in the reconstruct section I adjusted the highlight reconstruction settings using the mask) while the third images are simply applying the Sigmoid module with no changes. Take note of all the extra steps needed in Filmic versus Sigmoid!
Images are best viewed full screen on a laptop or bigger. If you’re viewing on a mobile device, it won’t show rows of three images, the images are always in the order mentioned though, so you can not get confused.

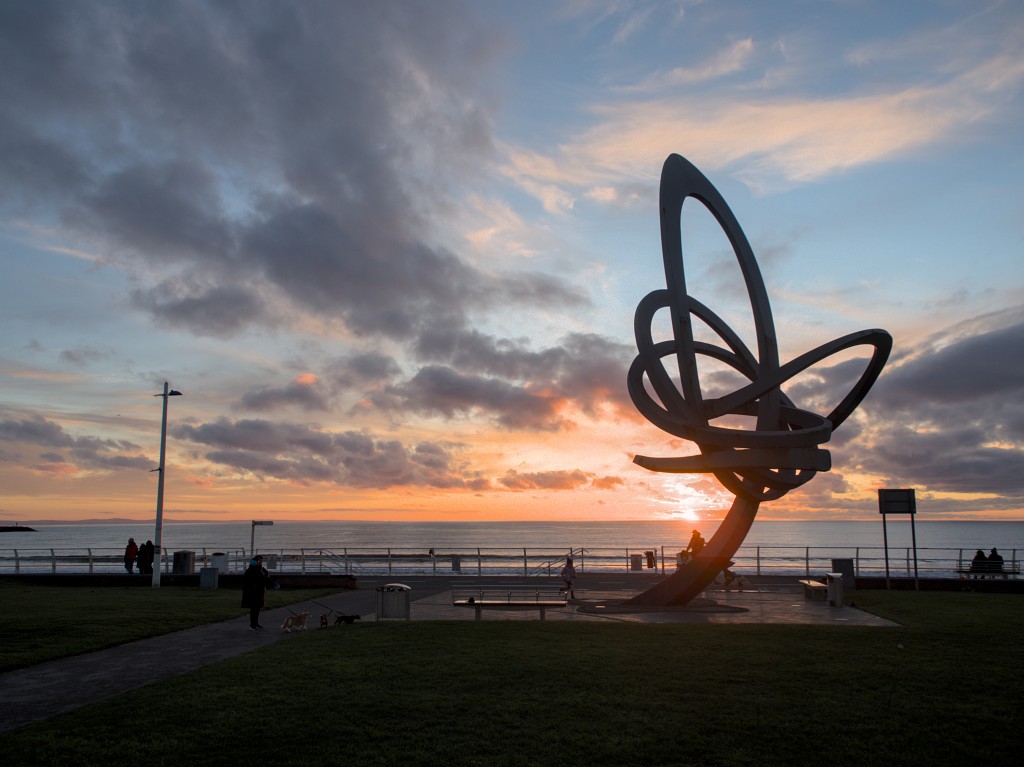


The easiest way to think about which module to use is anything with many highlights, such as landscapes with cloudy skies, or animal shots with lots of details, then filmic is usually the safest and most efficient module. For mostly anything else, especially scenes without a lot of highlights, sigmoid is fantastic. It takes only a second to turn on/off the individual modules to have a look if you are not sure. Remember though, Filmic RGB is the more powerful module, as it has much more control over it.


One thing you will notice is that the sigmoid module quite often gives a much nicer “filmic” look, simply by activating it, which is quite ironic when you think that is what the Filmic module is capable of. You may need to turn down the saturation on sigmoid compared to filmic RGB, so that’s another thing to look out for.
Of course, to throw a spanner in the works, as seen by the above examples, there are times when you may choose not to use either the Filmic RGB module or the Sigmoid module. It’s totally up to you, don’t let anyone tell you that you should or shouldn’t do anything, or in any particular order. As the end user, use the software as you want.

Filmic actually preserved the clouds at the top of the screen better than Sigmoid, however, Sigmoid has done a better job overall.

Notice the colour shift in this image in the very bright part of the skies (this test is not about recovering colour shifts, but showing initial usage with minimum tweaks). This can be removed with some work in Darktable, but for this image, using neither Filmic or Sigmoid just works out better with a quick edit.
Pros and Cons of Filmic RGB
There’s no denying that Filmic RGB is powerful, but in some ways that’s also it’s downfall, as many people simply want to press a button and get results. Even at its most basic setting, you still need to press a few buttons to make the initial adjustments.
+ Powerful
+ Amazing when highlights are involved
+ Can be used almost exclusively if need be
– Complicated
– Too many options and too many clicks
– Not always an easy quick fix
Pros and Cons of Sigmoid
The Sigmoid module is an almost one stop, one button press alternative to Filmic RGB. When it works, it looks amazing, although you sometimes have to just tame down the effect but dropping saturation or, in my case I drop the opacity which I find works extremely well in my testing.
+ Single click to get great results
+ Works amazing when you’re not worried about highlights
+ Gives an amazing “filmic” look to images
– Not as customisable as Filmic RGB
– It doesn’t work so well on highlights
– Maybe not enough options to tweak as some might like
Pros and Cons of using neither
Now, this is a strange one. For many, they are led to believe that you must use Filmic RGB or Sigmoid, but the reality is, that myself, and many others I’ve spoken to will sometimes use neither of these modules. I’ve found that in many situations, where you’ve nailed exposure and there is not a huge shift in dynamic range in the scene, you really don’t need to use Filmic RGB or Sigmoid. This of course is very much up to you, and the decision you make will depend on your knowledge and skill of photography and editing.


Filmic brings in much nicer contrast and has a nicer aesthetic in this image, however, you could be happy with either as a starting point.
Conclusion
What we conclude from all this need not be complicated. Filmic RGB and Sigmoid are both capable. If you wanted to, you could use Filmic RGB for every image, as it is an amazing module. With the options you have to tweak Filmic RGB, it is quite possible to achieve the look that you get using Sigmoid.
However, if you like that old fashioned look of old film in your edits, then the Sigmoid module could be used all the time. There’s be little to no tweaking needed with this module, and you can always adjust the highlights using another module.
Experimenting with your own images is key to understanding, and don’t be afraid to experiment. If you stick to the “Filmic for images with highlights and details, Sigmoid for anything else” way of thinking, it will help you understand their nuances.
At the end of the day, don’t stress over it and just have fun!
*Note. I used Filmic V6 as I prefer it and think it does a better job than V5 and below. During the writing of this article, I tried Filmic V5, but decided not to use the results as they simply didn’t get the job done as well as V6. The idea of this guide, as mentioned at lease once above, is to see which module gives the best results with the least amount of work. Some people, myself included, have to edit dozens or even hundreds of images in one go, so saving time is important! We all want to be taking photos and not editing them!

Thanks for the explanation. Still a question: you write: in my case I drop the opacity which I find works extremely well in my testing. How do you do this?
LikeLiked by 1 person
You can change the opacity of any module, thereby reducing its effect. Just activate any of the masking options and there will be an opacity slider. If you only want to affect opacity, use the leftmost icon in the the little row below the module – blend options – and you will see it.
LikeLiked by 1 person