
There’s an editing package that stands head and shoulders amongst the paid for and subscription editing package services out there, and it’s called Darktable. Many people would have heard of it, but presume because it is free, it is no good or not suitable. However, things couldn’t be further from the truth, as Darktable isn’t only amazingly powerful, but has a lot of useful features, especially (but not exclusively) for Fujifilm users.
What does Darktable generally offer?
Before we delve into what Darktable offers Fujifilm camera users, you need to know what Darktable offers in the way of it’s general features.
Think of Darktable as Lightroom, but on steroids. It offers a full library/Lighttable organisation section which allows you to view and tag multiple images, arrange them by various forms of ranking and much more, on a similar way to Lightroom. However you’ll have none of that importing inconvenience of Lightroom , as you can point directly to the directory your images are stored, or even just edit single images very simply.
In the editing portion of Darktable you can of course start the process of non-destructive editing. Darktable 3.4 has a wealth of options, many more than Lightroom offers for total control over the processing of your images.
Darktable has some very powerful and unique features for masking, which once used, you’ll wonder how you managed without them. Being able to curve the gradient line is something so simple, yet missing from every other editing package. There are also the parametric masks, which give you instant and full control over the areas you want with the tweak of some sliders (very much like colour or luminosity masks, but more advanced). In fact, there are a ton of masking options, something for every conceivable operation you may need to perform.
What’s in it for Fujifilm users?
Firstly it handles Fuji raw files with ease, avoiding so called artefact issues that allegedly plague some software. Noise and sharpening is handled extremely well, and you’ll always get clean looking images.
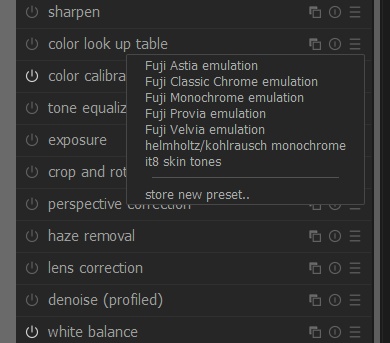
And then we have the built in colour science. Using the Colour Lookup Table module, you can instantly choose from a selection of Fujifilm film simulations. When added to your image they can be very accurate, especially when you can the exposure correct. You can fine tune them to by changing the opacity of the modules mask, perfect for getting things just right.
There is also a Velvia module, which, as the name suggests, adds colour and contrast to your image in a way that using the Velvia film simulation looks and feels. A great module for making your images pop.
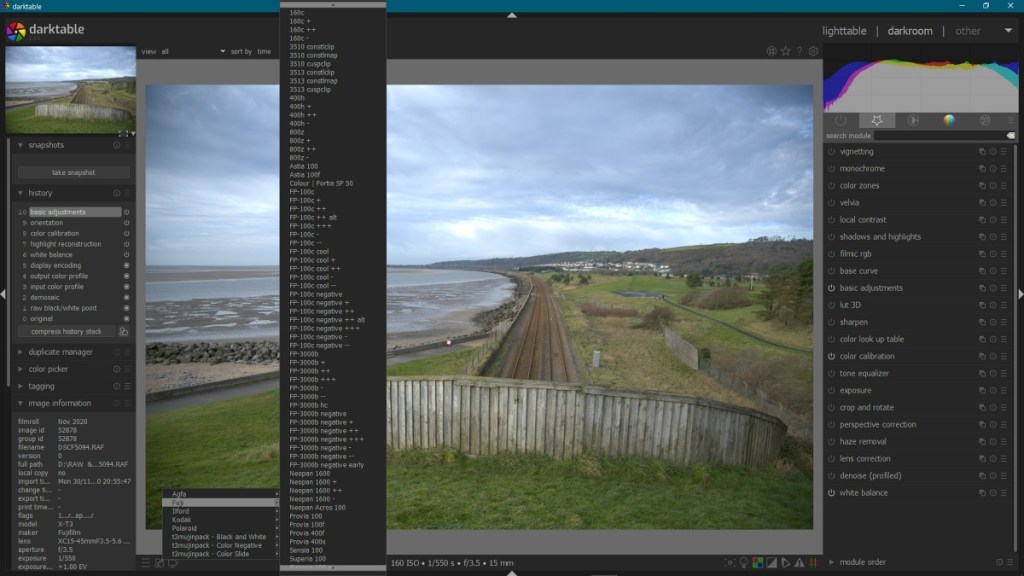
Finally, you have Darktable Styles (dtStyles) which can result be downloaded. There is a huge repository for Fujifilm styles, covering dozens of film stock variants and X-Trans III sensor styles. It’s a great resource to get your image looking “Fuji”, and styles can be adjusted easily, as they are usually base curves with often other adjustments which are added to your history stack for tweaking.

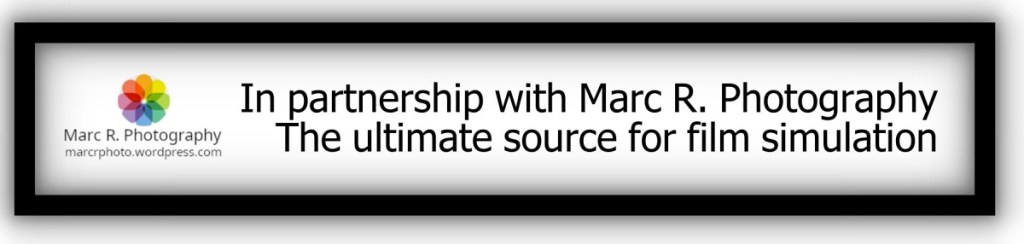
Of course, Darktable can use LUT files too, so as an added bonus, you can add any Fujifilm (or other cameras) LUT files to help you achieve what your aiming for, especially if you’ve used those LUTs in other programs. Check out my good friend Marc’s website here for accurate Fujifilm LUTs.
Conclusion
Darktable has a bit of a learning curve, but in its latest update to 3.4, it’s easier to use that it ever was. If you’re coming from Lightroom, Darktable should generally be more accessable.
For a free and open source program, you can tell a lot of love has gone into making Darktable. Written by photographers, for photographers, and it shows, plus it is updated on a regular basis and is available for Windows, Mac and Linux computer systems.
Visit Darktable here, and give it a download, as it’s free!
— If you like what you read, please subscribe to the blog, it really helps! Also Like and Share. I’d like to thank you for your visit to this blog and please return soon as there’s new content every couple of days.

excellent information, will give it a try.
LikeLiked by 1 person
Once you learn the basics, it’s straight forward enough. I love it for my Fuji raw files.
LikeLike
Hello Mark,
I think you will soon get a call from Adobe to work for them and come and promote their Lightroom.
This is the most convincingly written article on Darktable that I have ever read.
If I wasn’t a loyal Rawtherapee user, I would switch now.
I have been working with RT from the beginning, think around 2006/7. Darktable is a bit younger I think maybe 2 – 3 years.
RT is a bit more complete as a pure editor, and that’s also the Achilles heel : editor only.
As a complete package, Darktable is far out better than RT, and therefore the best – I’m not even saying alternative for LR – it is the best image editing program out there !
Perfectly described by you.
Expect that call from Adobe.
Marc.
P.S thanks for mentioning my site.
LikeLiked by 1 person
I started on Rawthreapee, before using them both and then staying with Darktable. Rawthreapee is of course also an excellent program.
LikeLike
One tip here as a recent Fuji user (X-T30) and long time Darktable user. You will definitely want to use the scene referred mode (as opposed to the default & legacy display referred mode). The base curve for Fuji is mostly useless BS. It’s just wrong at so many levels that it’s not even worth having that as a default. With scene referred, you get exposure and filmic instead.
However, the defaults for the exposure module are wrong for that because Fuji uses a sensor that is very different from other sensors in the market (xtrans). The default is to increase exposure by 0.5 EV to ‘help’ filmic compress the highlights. With a Fuji sensor, a value of 1.25EV is better. If you don’t do that, your photos look a bit dark and your whites will not be quite so white (grey). This is not a bug but a feature: Fuji has awesome dynamic range and most of the detail is where it matters: in the shadows. All you need to do is tell Darktable.
Basically the combination of exposure and filmic enabled by scene referred mode in the settings play together to make the histogram make the most of what is there. Fuji has a lot of detail in the shadows that you want to leverage by compressing the highlights a bit and thus moving the grey point. So raising the exposure by 1.25 and then letting filmic do the compression gets you a decent starting point for your edits. In some case I bump it up as much as 2 EV. But the default 0.5 is definitely not enough.
To make this the default, just go to exposure, right click and type 1.25 and apply and then save that as a preset and toggle the auto apply and make it apply to any image where the model is %fuji%. This causes darktable to auto apply this for every photo from any fuji camera.
This feature (available on every module) BTW. is a neat trick to save yourself some work when importing: you can tweak what is applied by default to match your needs and setup. If you get to the point where you feel like you are repeating what you do on every photo, this is how you automate that in Darktable.
LikeLiked by 1 person
Dear Mark, thank you for so long-awaited article on Fuji film simulations with darktable! This is incredibly informative and useful!
The one thing which I miss here is the darktable’s ability to perform demosaicing of X-Trans images at the best quality level ever available. I mean, you can use the demosaic module with the custom settings of:
– method: Markesteijn 3-pass (instead of default 1-pass)
– color smoothing: 5 times (instead of default “off” setting)
This is very CPU intensive, the in-camera CPU probably uses some more economic algorithm, but darktable with a good CPU and especially GPU allows you to get the best possible IQ from your X-Trans RAF.
LikeLiked by 1 person